
The Michelin Star Dessert That Anyone Can Make | Dark Chocolate & Strawberries
Its easy to think that desserts from high end restaurants are complicated, take hours to make and need loads of ingredients to pull off. But this isn’t always true.
In this blog post I’m going to show you how to make one of my favourite chocolate and strawberry desserts. It’s so easy anyone can make it, it takes no more than 15 minutes to come together and it only uses 5 ingredients.
The Chocolate Part
First I’ll grab a mixing bowl and break the chocolate into small chunks, next I’m pouring over 100ml of boiling water. Some of you will be thinking I’m crazy for mixing water with chocolate and you’re totally right to think this.
For those of you who have never mixed water with melted chocolate before you end up with a grainy texture…. something like this….. and unfortunately theres no saving it.

What’s different about the method I’m showing you today, is I’m mixing room-temperature solidified chocolate with boiling water. The important thing here is the water must be boiling and I have to use enough to be able to fully melt the chocolate.
So, it’s as simple as mixing the chocolate and water with a whisk until all the chocolate is melted and you have basically a chocolate sauce.
Next, I’ll grab a larger bowl, add a few handfuls of ice and a little cold water. Then I’ll place the bowl with the chocolate on top of that to cool it down. For the first minute or 2 it’ll look like not much is happening, and I’m making sure to whisk every 30 seconds or so and only very gently, the chocolate can go grainy if I whisk too hard.
I’m using water instead of milk or cream because it creates the purest most chocolatey tasting dessert that melts the moment it touches your tongue. Cream and milk, overtake and dilute the flavour of the chocolate a lot more, then you have to add coco powder and sugar to balance it.
This turns a simple recipe 2 ingredient recipe into something unnecessarily complicated with a worse flavour.
After around 3 minutes, its starting to thicken, from here I’m going to mix with the whisk constantly but still very gently.

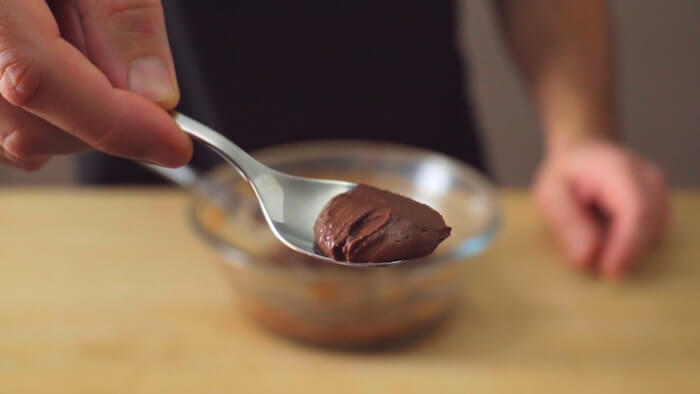
And after around 4 minutes I’m at this nutella-looking stage, and then for the final 30 seconds the chocolate fully sets.
The whole time I was just with gently whisking, nothing aggressive… this is probably the most important step of the whole recipe. Take the bowl out of the ice and close up it looks something like this smooth, light and very chocolatey.
If your’s doesn’t set fully like this then don’t panic, just break another square or two of chocolate in and heat the mixture up again in the microwave. Do it in 2 or 3, 20 seconds stages because chocolate and high heat don’t go well together and you don’t want your chocolate to seize.
Then just repeat the chilling process again. All chocolate is different and will set differently, so I’ve based this recipe on this brand because it’s probably the most widely available, high-quality chocolate.
I’m placing the bowl in my fridge until I need it.
Strawberries
Next up, the strawberries. One of the biggest questions about strawberries is –
“Why are my strawberries always tasteless or sour?”
So I’ll show you a few tricks that chefs use to get around this and maximise the flavour of their berries, because most commercially grown strawberries are bred to look good rather than taste good, unfortunately.
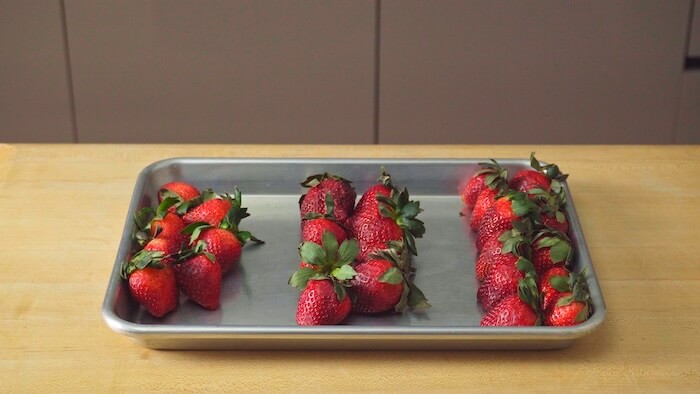
It all starts by sorting the strawberries into different categories, because with any summer berries that you buy some will be under ripe, some will be over ripe, some will be damaged and hopefully you’ll have some that are picture perfect.
Now I’ve got, one pile of perfectly ripe, good-looking berries with no bruises or holes. Another pile of damaged berries, these are mostly ripe but have bruises and holes in them. And lastly a pile of under ripe berries, these feel firmer than the riper ones and haven’t got the same even depth in colour and won’t have a great flavour.
So the ripe ones from this pile will have the best flavour so I’ll eat these fresh as they are. The damaged ones from this pile will be used for sauces, jams and a method I’ll show you in a minute. And the under ripe pile unfortunately won’t ripen anymore so I’ll use these for cooking only.
First I’m going to take a few of the damaged berries, take the tops off and cut them into quarters, sixths, some into random shapes and just slice out any parts that look rotten or bruised.

The top part of the strawberry is the most tasteless and the most under ripe, so i’ll just slice around the stem until i just have this inedible part remaining. Then i’ll slice across those thin slices to get a fine dice.
Next I’ll add everything to a bowl with around 1/2 a teaspoon of sugar, this can be any sugar Demerara, caster, icing…. whatever you have.
This is known as macerating, and whats great about doing this is you can turn under ripe berries, tasteless berries into something with more depth in flavour, a better texture and of course they’ll be a little sweeter.

This works with any fruit, some work better than others and you can also do this with different alcohols, honey, maple syrup…. basically anything with sugar and it will soften and enhance the flavour of your fruit. I’m just going to leave these to sit for a few minutes and let the sugar do its work.
Next, i’ll take a couple of the ripe, good looking strawberries, slice the tops off again and i’m just going to quarter one and cut the other in half like this. And i’ll do the same thing with the tops as a did a minute ago, slice around the stem, dice them and add them to the bowl with the other berries
Now I have a bowl of macerating strawberries with some that were bruised and damaged and the tops finely diced, a few of my perfectly ripe strawberries just cut into halves and quarters ready to go and this is all the waste I have, a few stalks and a rotten piece that i had to cut out.

Let’s plate this dessert.
I’m going to use one of the simplest plating techniques using a regular flat white plate, but you could use a bowl, a side plate anything would work really.
So first i’ll grab the strawberries that have been macerating for around 5 minutes, they’ve completely changed, they look softer and the sugar has created a light sweet smelling strawberry sauce.
I’m just going to make a line down the plate but just off centre, keep the it as clean as possible but don’t worry if you make a bit of mess we can hide that with other things in a minute.
Next i’ll get the chocolate mixture from the fridge and a dessert spoon in a little hot water. I’m going to make a rocher, its pretty simple, grab the spoon, shake most of the water off and just scoop into the chocolate like you’re scooping a ball of ice cream
Then using the rim of the bowl take off any bits that are falling off the edge of the spoon, it takes a little practice but you’ll get the hang of it after a few tries.
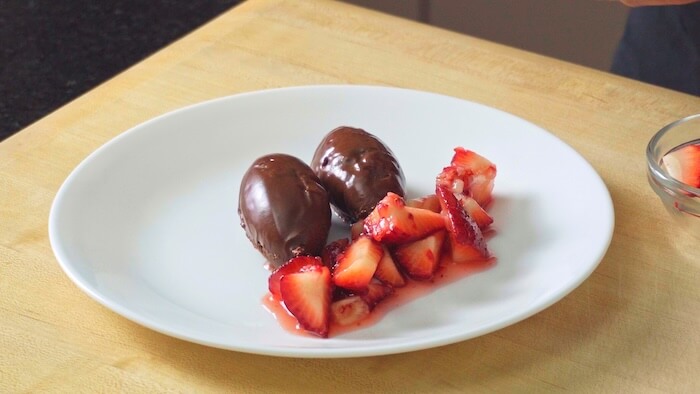
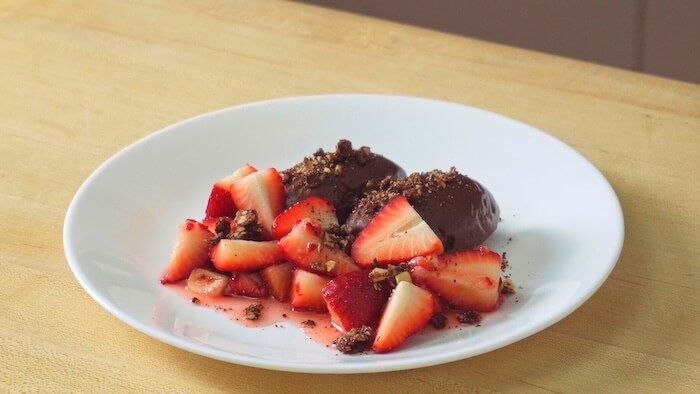
Im going to put 2 of them just touching the the line of strawberries, using a hot spoon is what gives this sheen to the surface of the chocolate. Then the fresh strawberries, wherever looks good and for a final touch this plate needs a crunchy texture.
This could come from so many things, you could make a crumble or something else crunchy and sweet. But i’m going to take the easy road and use some chocolate granola, you have so many options here.
Slightly crushed cereals, biscuits or cookies will be your best options for a quick and easy final touch.
Thats a rich, tasty, simple dessert using only 5 ingredients chocolate, water, strawberries, half a teaspoon of sugar and a pinch of granola.

The Michelin Star Dessert That Anyone Can Make | Dark Chocolate & Strawberries

This dark chocolate and strawberry dessert is so easy to make, only uses 5 ingredients and comes together in 15 minutes or less. This recipe is great for using your strawberries in different ways and is a firm favourite with chocolate lovers!
Ingredients
- - 140g dark chocolate (I used Lindt 70% cacao)
- - 100ml boiling water
- - 3-5 strawberries per portion
- - 1/2 teaspoon of sugar
- - A little granola or something else crunchy
Instructions
- Break the chocolate into small chunks in a bowl and pour over the boiling water.
- Whisk this gently until all the chocolate is melted
- Then fill a larger bowl with ice and a little water, place the chocolate bowl on top and gently whisk for 3 to 5 minutes until the chocolate mixture has set.
- Place in your fridge until you need it.
- Prepare your strawberries, some for fresh and some for maceration (see video)
- Serve your dessert on a plate or in a bowl, with fresh strawberries, macerated strawberries and granola (see video)