
Yorkshire Pudding Recipe: Tricks No One Talks About
Last updated on October 13th, 2026
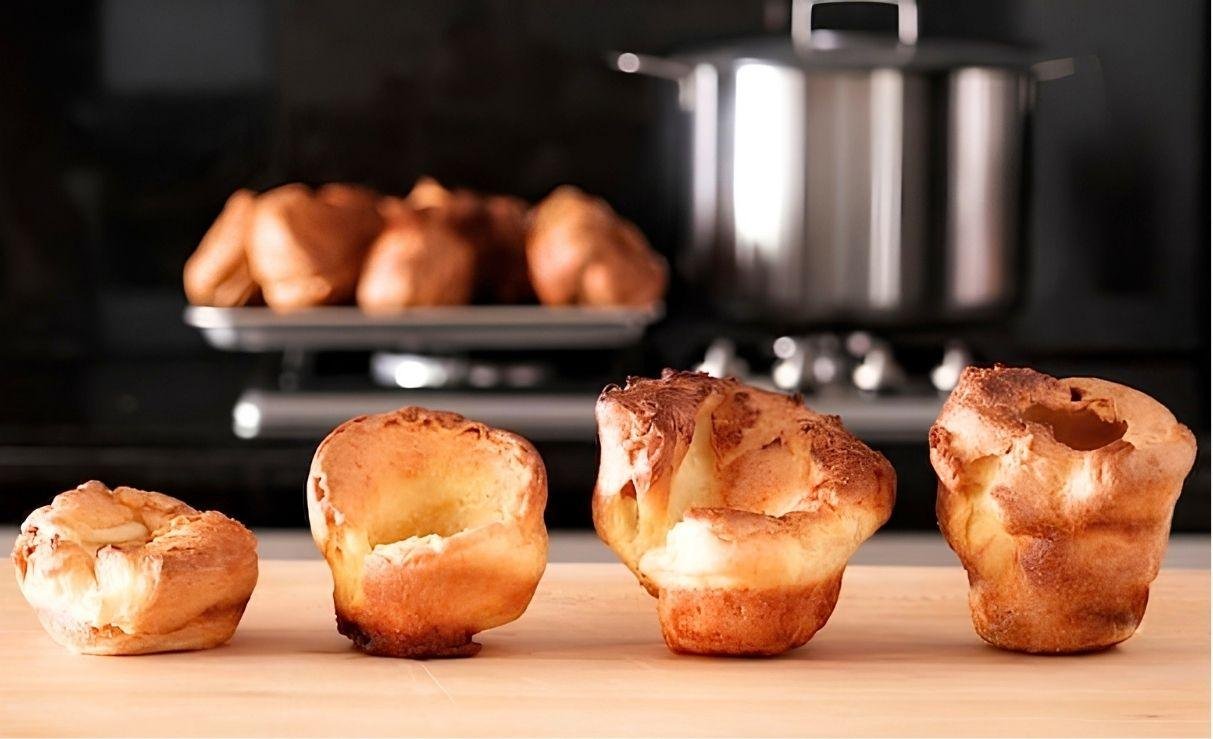
There’s a lot of mystery surrounding Yorkshire puddings. Some people nail them every time without breaking a sweat, while others end up with the dreaded hockey pucks, even when they follow the same recipe. This Yorkshire pudding recipe is the batter I’ve used for the last 20 years, and I’ll show you it’s technique, not the batter, that makes the difference.
Well in this blog post, I’ll be going through 3 different methods, troubleshooting each to end up with a one size fits all solution. Whether they’re going next to a golden roast chicken or a joint of beef, the same rules apply.
I’ll be using the same simple equipment, the same oil, the same oven and crucially the same batter. Because today I’m going to prove to you it’s all about the cooking technique, and nothing else.
I’ll also show you the best way to store them, so you can make them ahead of time. It’s the same make-ahead thinking behind my stovetop Christmas red cabbage. I’ll also show you how to easily get them unstuck, if they stick.
What Is the Ratio for Yorkshire Pudding Batter?
Equal volumes of egg, flour and milk. I crack the eggs into a glass, fill a second glass with plain or bread flour to the same level, then use that same level again for the milk. Measuring by volume means it doesn’t matter if your eggs are big or small. Use a flour with no raising agent, otherwise you get muffins instead of Yorkshire puddings.
Whisk the flour in with about half the milk first, because the thick mix is easier to get lump-free, then add the rest. You want the consistency of double cream: thick but pourable, coating the back of a spoon. Semi-skimmed milk works best. If you only have full-fat, add around 10 percent water. Add the salt just before baking.
How Do You Know When the Oil Is Hot Enough for Yorkshire Puddings?
Oil is hot enough when it’s smoking, looks as loose as water and makes the batter sizzle the instant it goes in. At 220°C that takes at least 10 minutes. The single biggest cause of sticking, poor rise, and uneven colour is oil that isn’t hot enough when the batter goes in. In a first, basic attempt using oil preheated for just 5 minutes, the batter didn’t sizzle hard enough on contact: the puddings stuck to the tin, came out too blonde, and only managed a middling rise. The fix is simple but easy to skip: preheat the oil for at least 10 minutes, until it looks noticeably looser and starts to shimmer like water rather than sitting thick and still, and make sure it’s smoking hot before the batter goes anywhere near it. Speed matters too: once the batter is in, get the tray into the oven straight away so the puddings start cooking immediately while the oil is at its hottest. Oil that’s properly hot from the start means nothing sticks to the tin, which in turn means you can bake the puddings longer without the bottoms burning, giving you more time to build colour and rise. Hot fat is also the secret behind my method for roasting any potato.
What If They Stick Anyway?
Be patient. Leave them in the tray for a few minutes and they firm up slightly, then a little wiggle frees them.
How Do You Make Yorkshire Puddings Rise Higher?
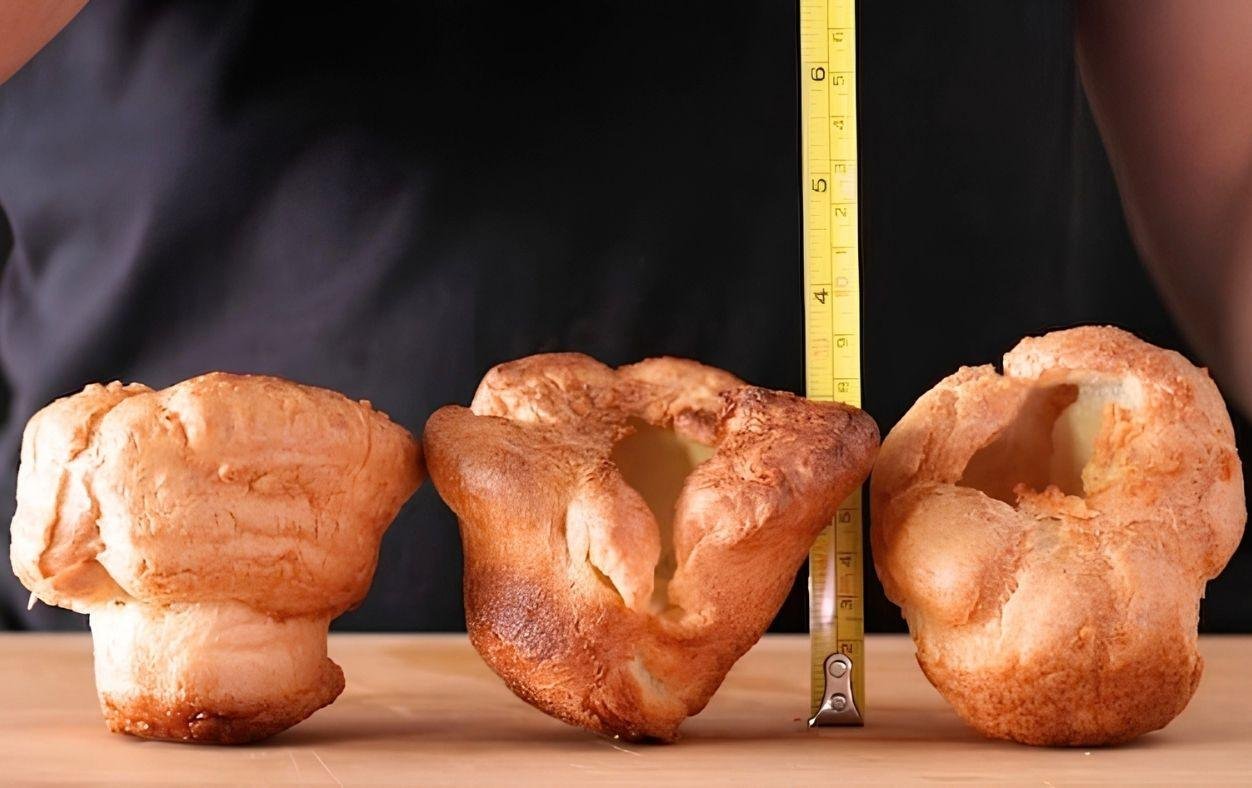
Give each pudding space and shield the tray from the fan: use every other mould in the tin and prop a sheet of foil around the tray as a windbreak. That gives you a taller, more even rise. Even with hot oil and a good batter, puddings baked all together in a full tray tend to come out lopsided: tall and even at the back, spread outwards instead of upwards at the front. Two things cause this: the puddings in the centre of the tray block heat from reaching each other as they rise, and a fan oven exaggerates that unevenness further by blowing air unevenly across the tray. Turning the oven temperature up doesn’t solve it: past around 220°C the puddings just turn into dense, heavy pucks instead of rising properly, so an oven thermometer is worth using since built-in dials are rarely accurate at that point. The gaps between the puddings stop them crowding each other, and the foil works like a windbreak on the beach, shielding them from the fan’s airflow. Between the spacing and the shield, the puddings rise far more evenly top to bottom and side to side.
Should You Rest Yorkshire Pudding Batter?
Yes, and it makes a real difference. The batter itself doesn’t need to change between attempts to get dramatically better results: only how long it rests before it’s used. A batter used straight after mixing gives a fair but unremarkable rise. Resting it in the fridge for a few hours and letting it come back up towards room temperature before baking gives noticeably more puff, crispness, and a deeper, more rounded flavour. Resting the batter pays off in my Breton buckwheat galettes too. Taking that further: resting the batter in the fridge overnight, around 14 hours, then letting it sit out for another hour to lose its chill: combined with the hot-oil and spacing fixes above, is what finally gives a monumental, consistent rise with even colour across every pudding. Once that rise is achieved in a hot oven, dropping the temperature partway through baking (from around 220°C down to 190°C) lets the puddings finish cooking through and colour evenly without the tops burning. Don’t forget a gravy, and my foolproof pan sauce method works perfectly with the roasting tray.
Can You Make Yorkshire Puddings Ahead of Time? My Full-Day Timeline
Yes: it’s easier than most people think, and this is the timeline I use. I plan my charred make-ahead Brussels sprouts around the same timeline. The night before – Make batter and store in the fridge overnight.
8:00am– Take batter out of the fridge
8.45am – Preheat oven
9:00am – Preheat molds with oil
9:10am – Cook first batch
9:50am – Preheat molds a second time (if you’re quick between batches the molds retain their heat so the reheating of the oil takes less time)
10:00am – Cook second batch
- Repeat this process from here, for however many batches you need.
- Keep on a cooling rack
2:00pm – Flash them in the oven for 5 minutes @ 180c (355f), just as you serve the rest of your meal.
Why do my Yorkshire puddings stick to the tin?
Sticking almost always means the oil wasn’t hot enough before the batter went in. Preheat the oil for at least 10 minutes, until it looks thin and shimmers like water, and make sure it’s smoking hot so the batter sizzles the instant it hits the tin.
Why do my Yorkshire puddings rise unevenly?
Uneven rise is usually caused by crowding and fan airflow. Puddings baked in every mould block heat from reaching their neighbours as they rise, and a fan oven blows air unevenly across the tray, making the lopsidedness worse. Using every other mould and shielding the tray with foil helps them rise evenly.
Does resting the batter actually make a difference?
Yes, significantly. A batter used straight after mixing still works, but resting it in the fridge overnight and letting it come back towards room temperature before baking gives noticeably more rise, crispness, and a deeper flavour.
Can I make Yorkshire puddings ahead of time?
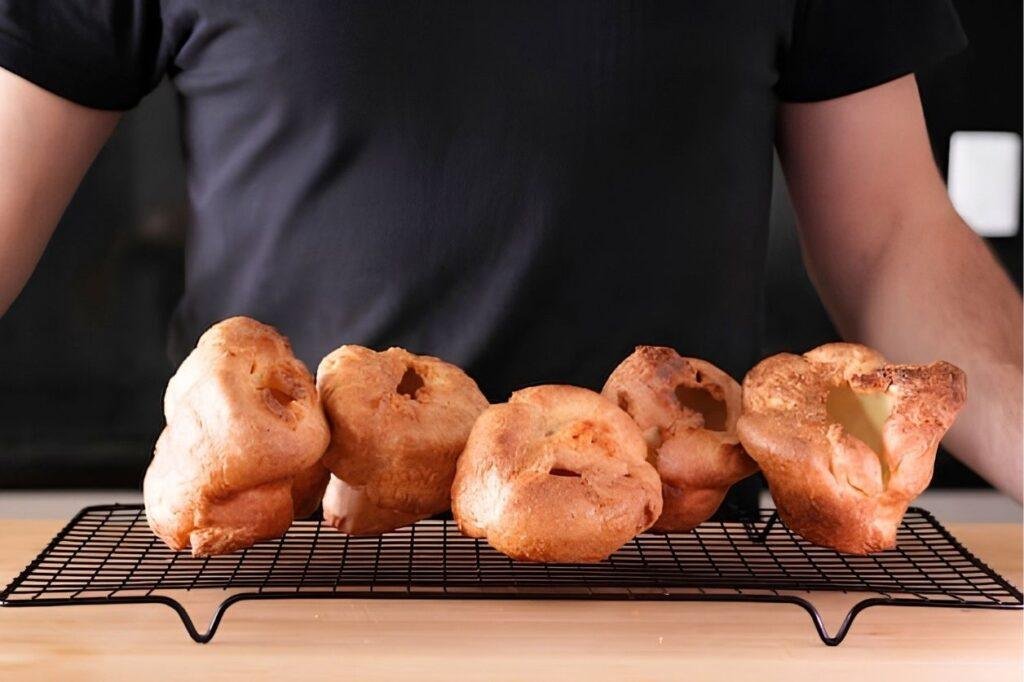
Yes, they store well at room temperature on a wire rack for a few hours after baking. To serve, flash them in a hot oven for around 5 minutes to bring back their crispness before bringing them to the table.
What’s the highest oven temperature I should use for Yorkshire puddings?
Around 220°C is the practical ceiling. Pushing the temperature higher, to 230°C or beyond, tends to produce dense, heavy puddings rather than a taller rise, so it’s better to fix rise and colour through oil temperature, spacing, and batter resting instead.
What flour should you use for Yorkshire puddings?
Plain, all-purpose or bread flour, as long as it has no raising agent. Self-raising or cake flour will give you muffins instead of Yorkshire puddings. I use a flour with around 11.5% protein, but in my experience the exact protein level isn’t that important.
How do you stop lumps in Yorkshire pudding batter?
Whisk the flour into the eggs with around half of the milk first. The mixture is thick at this stage, which makes it much easier to whisk until smooth with no clumps. Then add the rest of the milk.

Yorkshire Pudding Recipe: Tricks No One Talks About
Equipment
- Baking / Roasting tray
- Muffin / Yorkshire pudding tin
- Wire / Cooling rack
- Mixing bowl / Bowl
- Drinking glass (as measure, cup)
- Oven thermometer
- Spoon (table, dessert, tea)
- Whisk
Ingredients
- 3 eggs cracked into a container – see video
- Plain all-purpose or bread flour filled to the same level in the glass (around 120g)
- Semi-skimmed 2% milk filled to the same level again (see video)
- This is enough to make around 6 Yorkshire puddings simply multiply or divide the recipe for more or less portions.
Instructions
- Measure the volume of eggs, add to a mixing bowl, add the same volume of flour and 1/2 the volume of milk.
- Whisk together until lump-free and add the rest of the milk. (see video)
- Leave this batter to rest for at least 30 minutes to 48 hours, the longer the better the flavour and the rise.
- Preheat your muffin tin with a little oil or fat for 10 – 15 minutes at 220c (428F)
- Season the batter with salt before baking the Yorkies.
- When the oil is hot, pour your room-temperature batter in, around halfway up the molds.
- Bake at 220c for 15 minutes, then reduce the temperature to 190 for a further 10-20 minutes until they are evenly golden brown.
Video
Nutrition
Nutrition Facts
| Total Fat | 7.7g |
| Saturated Fat | 1.5g |
| Cholesterol | 95mg |
| Sodium | 48mg |
| Total Carbohydrate | 16.6g |
| Dietary Fiber | 0.5g |
| Sugars | 1.4g |
| Protein | 6g |
| Potassium | 91mg |

What a great video. It’s easy and makes so much sense.
I’m guessing that if I want more puddings, I can just use bigger glasses/containers and use 6 eggs or more, following the same measurement method.
Also, is the salt always added in at the very end or can it be added at the start? Either way, how much salt is used? Thanks.
Hi. Yes, you can scale the recipe up or down to make however many you need. I always add the salt around 15 minutes before I want to bake, I wouldn’t leave it in there for any longer than 2 hours (this gives you time to cook off the YP’s in batches). As for an amount for the 3 eggs I use around half a teaspoon, this is on the conservative side because I prefer my meat, potatoes, gravy etc to carry most of the flavour. Probably the upper limit before you start tasting the salt will be around a teaspoon for a 3 eggs recipe. I hope this helps, thanks for getting in touch
Why don’t you add salt as you make the batter? Why does the salt only want to go in at the last minute?
Thank you! My MIL used to make this and I never figured it out. She passed and so did the recipe. She would make it with roast beef and would put the juice, grease from the roast in the bottom of the pans. Hopefully I will be able to get it to work. They always went flat when I would try.
Great video thanks. Do you have any recommended muffin tins to use?
Love your videos, and think I’m serving Yorkshire Pudding next week! Thanks for all your clear, easy information and directions. Happy holidays!
Hi Ben, great video! I was wondering if you can season the YP with other spices than salt? Such as sage or paprika ? Do you have any great suggestions?
Hi I’m in the US and have a couple questions. Can you use a regular muffin tin ? I don’t have a special one. Also my oven doesn’t have a fan so I’m assuming that the foil isn’t needed?
Back decades ago my grandmother would pot the batter into the prime rib drippings and bak in the roasting pan. Looked a little like a Dutch baby. Not as tall and flaky as yours. Have you done this method? Or was my gram inventive.
Thanks Laura
Thank you for sharing! Going to give this a go today as the family are coming over! Merry Christmas.
This turned out absolutely wonderful. I only just switched to doing individual puddings a couple of years ago (used to just go the roasting pan route) and the results have been inconsistent (puff well, then fall after cooking; never ended up with hokey pucks thankfully). These were puffed to the moon, held the puff, had the perfect amount of crispness on the outside, still chewy inside. Most importantly, everyone loved them!
I used your recipe and techniques to make the absolute best Yorkshire puddings for our Christmas dinner this year! No sticking to the pan, consistent color from top to bottom, and glorious height on all six. They were a hit! The perfect accompaniment to our prime rib meal.
I’ve been making yorkies for 45 years and thought I had it cracked …. BUT this is a game changer! Yorkies with everything is the name of the game now. ! Thank you for for all the reseqrch Ben.
Yorkshire Pudding is such a comforting classic! The crispy outside and soft, fluffy inside make it the perfect side for roast beef and gravy.