
Crispy Pork Belly Recipe | Perfect Light Crackling
Last updated on October 16th, 2026
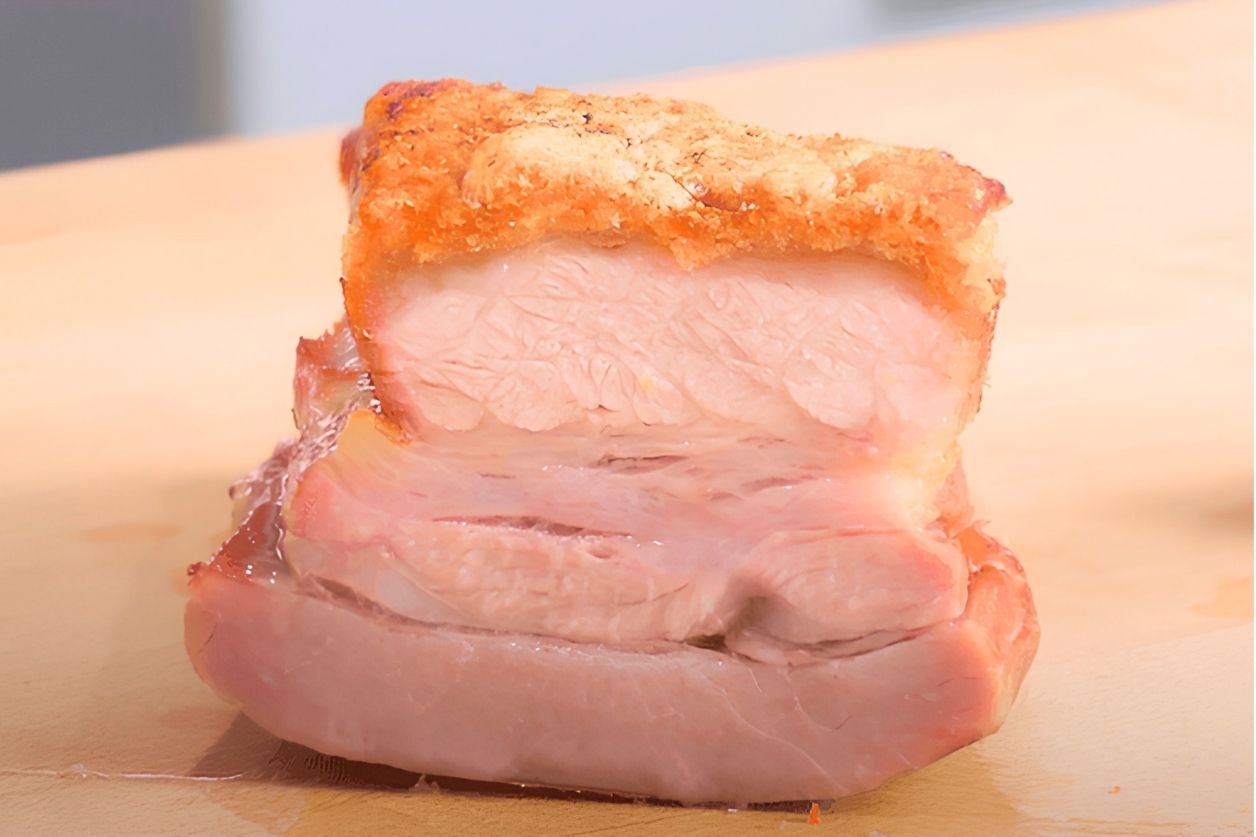
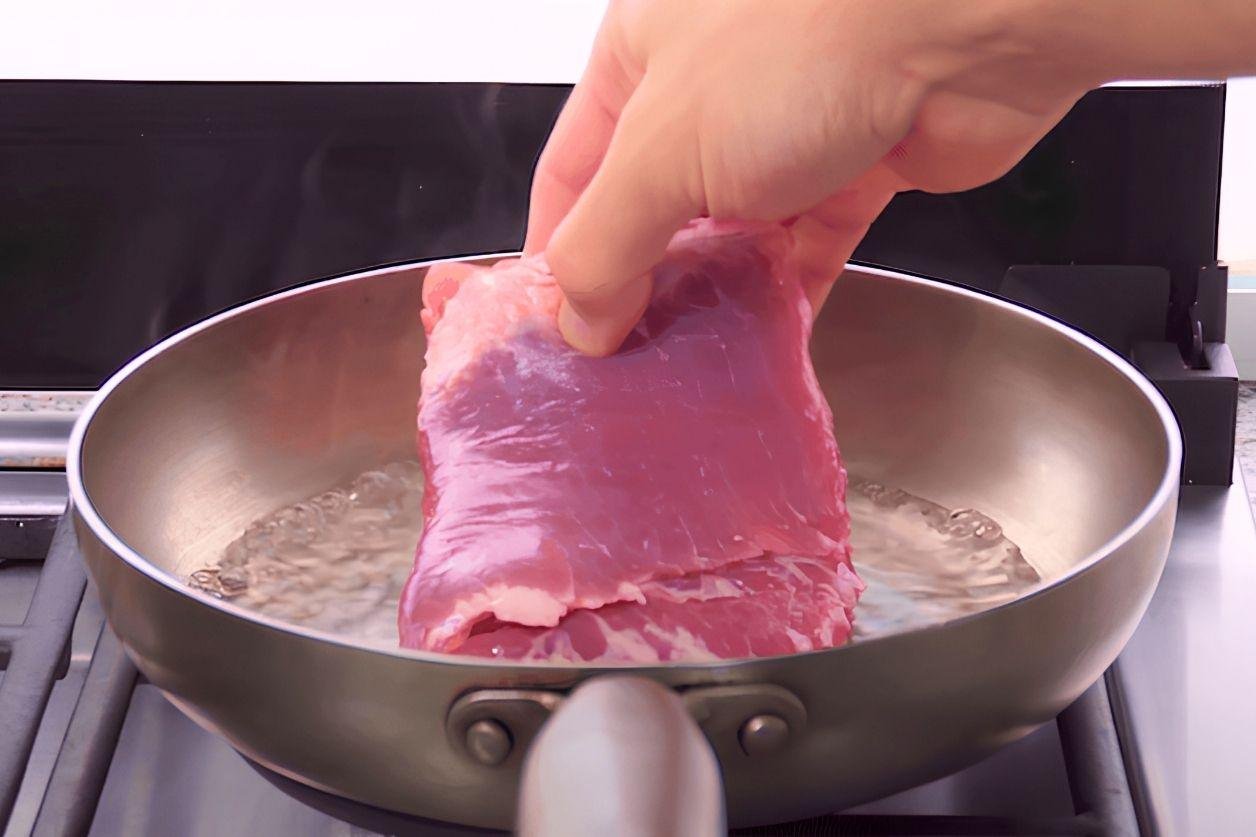
This crispy pork belly recipe starts off in a strange way. The first step is simmering the belly skin side down in a little water for 2 minutes, then dunking it into cold water to cool off. It’s a trick I also use for porchetta with light crackling, because it’s what starts breaking down the skin.
So cooking pork belly has always been something that has bugged me. Even after 20 years of professional cooking I’ve never been 100% happy with the crackling. Sometimes it comes out great but other times I fear I’m going to break a tooth, even though I cook it in the exact same way.
It’s a really inconsistent piece of meat to cook. But look at this chicharron I bought earlier, this is essentially crackling, it’s just been cooked separately from the meat.
It’s so light and crisp, there’s no risk of breaking a tooth here at all!
So I wanted to know if it’s possible to get something this light and crispy on top of a pork belly, just by roasting it in the oven. I don’t want to deep fry it, pour super hot oil over the skin or shallow fry it in a pan to achieve this.
Pork skin and hot fat, do not go well together! Oh yeah and it needs to have tender meat and cook in around an hour.
Not much to ask right?
Ingredients You’ll Need
You only need three ingredients: a 500 g piece of skin-on pork belly, 6 g of salt and a splash of vodka (10-20 ml). You’ll also need toothpicks, a saucepan, some foil, a wire rack that sits over a roasting tray and a probe thermometer.
How to Make Crispy Pork Belly in the Oven
Simmer the belly skin side down for 2 minutes, cool it in cold water, pierce the skin with toothpicks, salt it and rub on a splash of vodka. Dry brine it for 12 hours, then roast at 170°C (340°F) until it reaches 80-85°C inside and finish at 250°C (480°F) for 10 to 15 minutes until the crackling puffs.
So, I’ve combined all of the techniques that are proven to work into 1 effective method. I’ve taken inspiration from acupuncture, physics and a 15-year-old blog post that’s buried deep in the internet.
The best thing about this method is that there’s not much hands-on work, it takes less than an hour to cook and there’s no crazy high level of cooking skill needed. In fact, you don’t even need to use a knife.
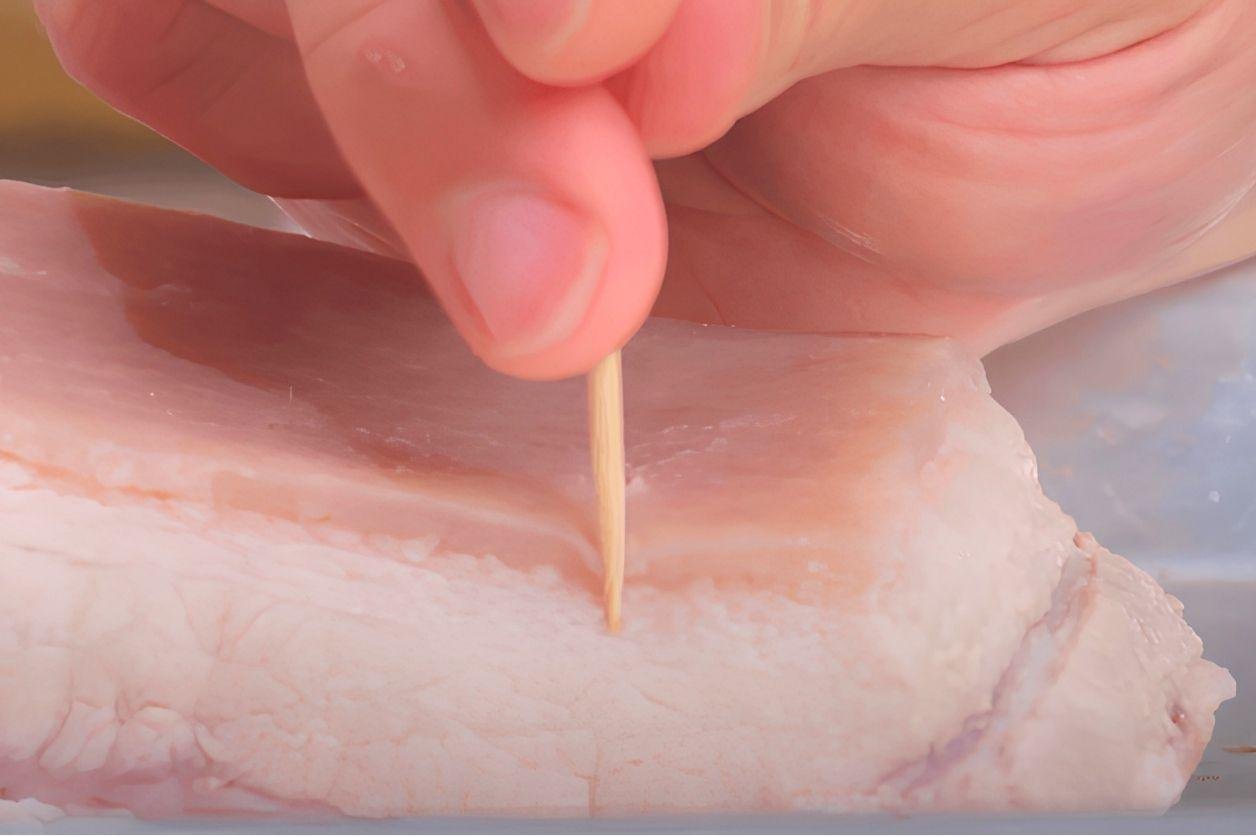
Grab some toothpicks and pinch a few of them between your fingers, then just start to jab the skin of the pork. Pierce as close together as you can. It’s best to work in a pattern rather than random jabbing because it’s not easy to see where you’ve been.
You don’t need to go deep, aim for around this far.
This seems like a bit of a faff but it doesn’t take long and it’s easier than scoring the skin with a knife.
Piercing vs Scoring: Why I Skip the Knife
Scoring is the traditional way to prepare the skin, but it asks a lot of your knife. This brings me onto pork belly number 2. I’m going to prepare it using the most common methods of scoring, salting and roasting, so you can see the night and day difference this traditional method makes compared to the new way I’m sharing with you today.
Usually the skin is prepared by scoring it with a sharp knife, there are a few different ways, straight lines, criss cross, or a grid like this.
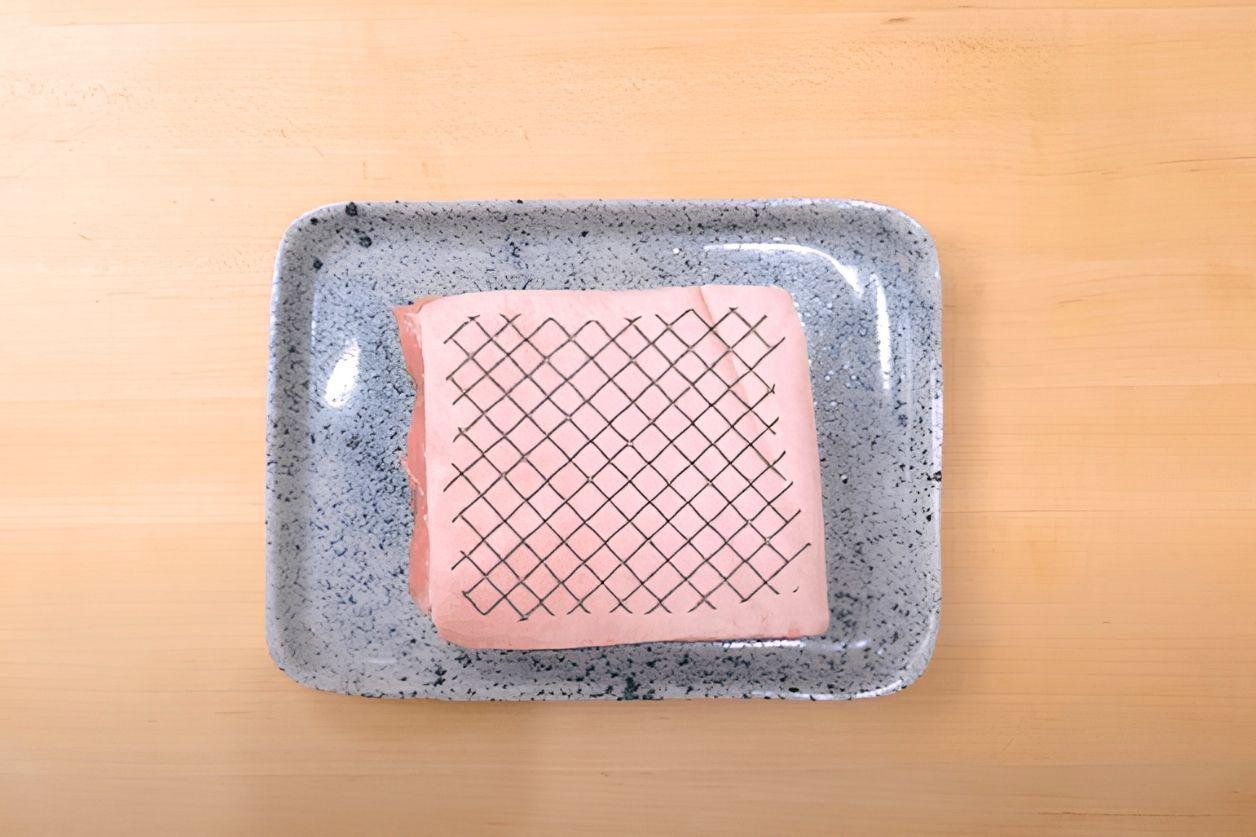
Now there’s some issues here, the main one is you need a super sharp knife to be able to do this properly. If your knife isn’t sharp enough then you’ll have to apply more pressure to break through the skin. This makes it really easy to slice too deep into the meat.
This dries it out, creating tough, chewy patches of meat, not the tender, melt-in-your-mouth experience you’re looking for.
I opted for the criss cross pattern and I made a couple of slashes a bit too deep, so we can see what happens with this one.
Dry Brine Pork Belly With Salt and Vodka
From here I’m going to salt both the bellies all over, I used around 6 grams of salt for each. Dry brining is something I do to all my big cuts, and I go into more detail in my steak secrets for cheap cuts.
Evenly season the salt all over the meat and the skin, and rub the salt into the skin a little, like a light exfoliation.
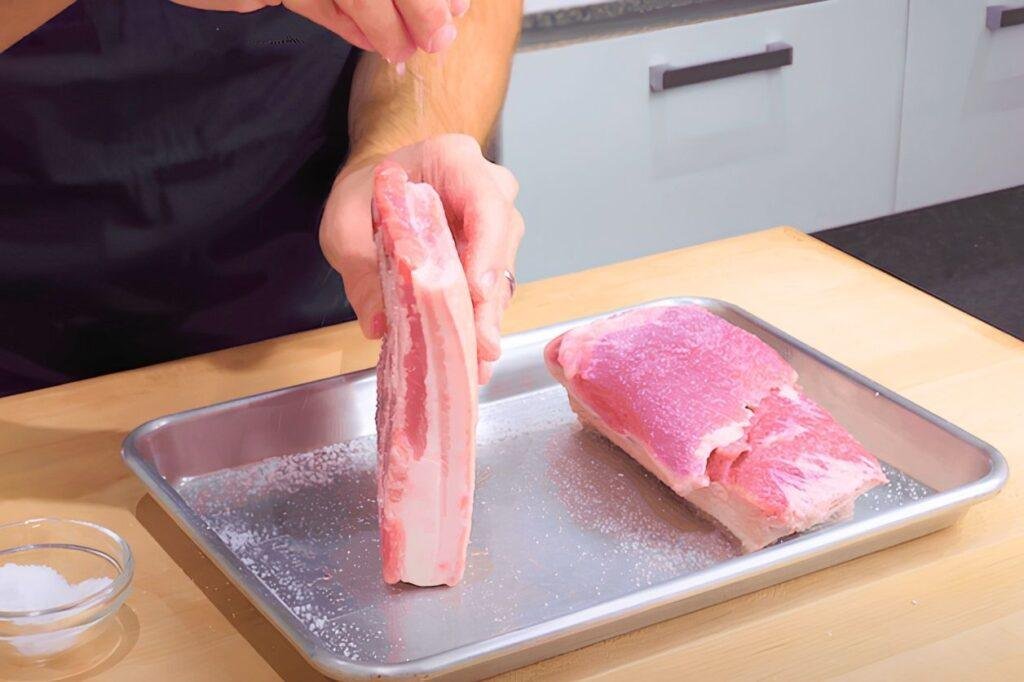
Now the weirdest but possibly the most valuable part of this recipe is what I found buried deep on the internet. Someone known as “Origamicrane” did an extensive test on 10 different pieces of pork belly.
They found that rubbing a splash of vodka on the skin of the pork, gave incredible results. So of course we have to find out if this works.
Apparently you don’t need much, just a splash, rubbed all over the surface of the skin. That’s all the preparation done, it really couldn’t be much easier.
Now I like to leave it to brine for 12 hours in the fridge, but you could roast this straight away.
I like to dry brine all my meat covered in a large container, you just want a lot of air around the pork, there are many ways you could achieve this. I use the same covered approach when salting the bird for my juicy roast chicken.
Lots of recipes recommend doing this uncovered in the fridge, but I don’t like having my apples, tomatoes and whatever else is in there coated in essence of raw pork.
Some things have changed overnight, there’s condensation on the container, some water on the tray and both of the skins look a little drier. These are all good signs.
Levelling Out the Thin End So It Crackles Evenly
One of the most overlooked and simple steps when cooking pork belly is doing something about this dip. It’s where the meat thins out, and this part of the skin is always the last to crackle.
So the best method is to level it out, you can use a piece of onion, a slice of potato, a stick of celery, and if you haven’t got any of those then a ball of foil will work just as well.
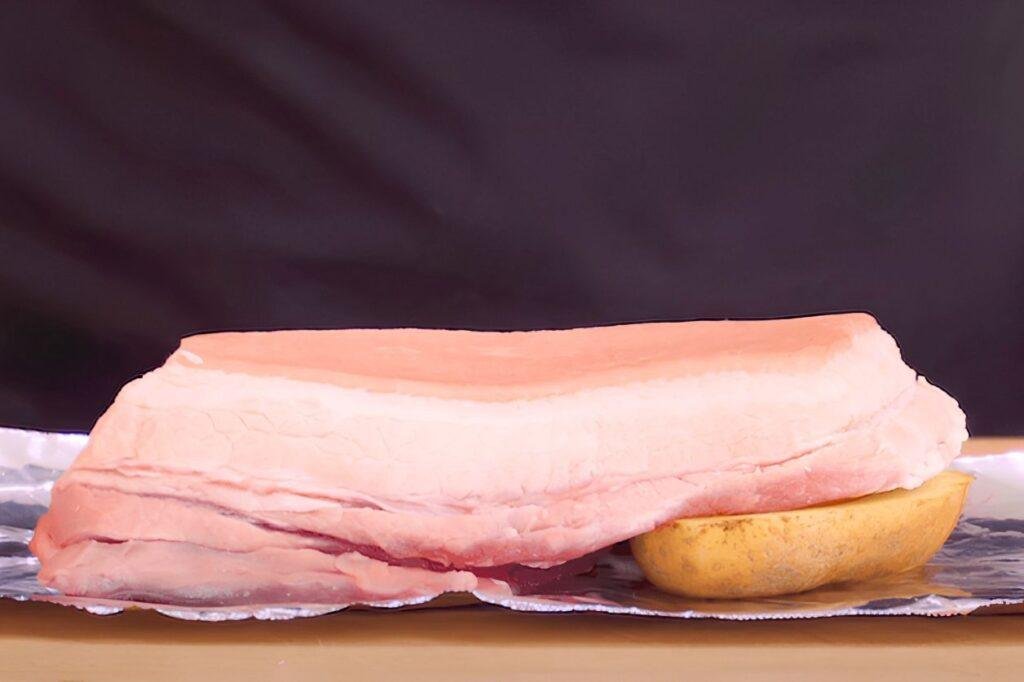
Now with a sheet of foil just fold up the sides so they sit below the skin. Crimp the corners and you want to be left with something like this, where the skin and the top layer of fat are the only things not covered.
This foil container is doing 2 things for us. The first is that it’s going to protect the meat from the high temperatures of the oven, and the 2nd we’ll talk about a bit later.
How Long to Cook Crispy Pork Belly in the Oven
For a 500 g belly, expect around 45 minutes at 170°C (340°F) until the inside reads 80-85°C, then 10 to 15 minutes at 250°C (480°F) to puff the crackling. That’s about an hour of oven time, plus a rest of at least 20 minutes.
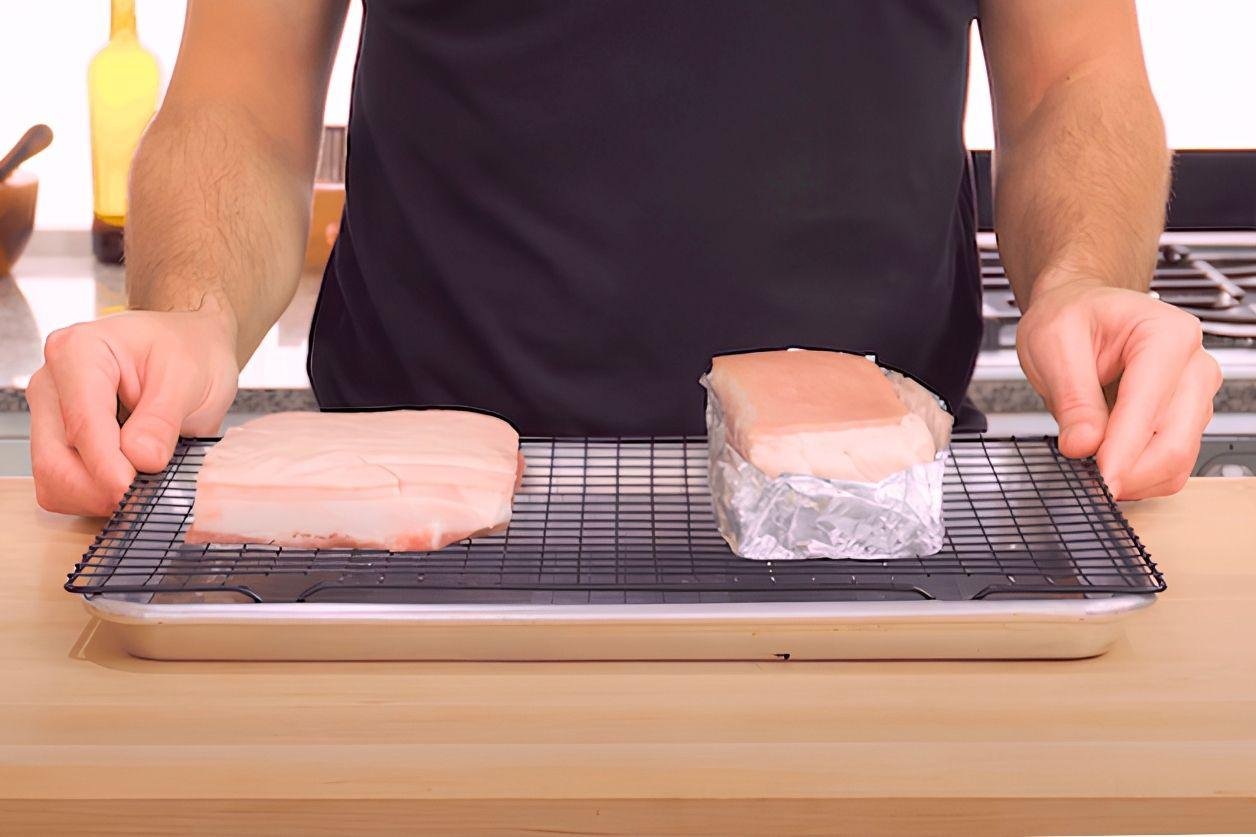
Next place it on a wire rack that’s over a roasting tray. A rack does the same job when I’m cooking chicken tikka on a rack. The other belly it’s just going on the rack unlevelled and uncovered as it is.
This is about as high as I like to go with the temperature of my oven in this 1st stage of cooking. Any higher and a belly of this size and shape will cook too quick and risk becoming tough.
This temperature can be so much lower though, the lower, the more tender the end result will be but the longer the cooking time.
I want to show you the quick end of the scale today because it only takes around an hour in total, including the 2nd step that we’re about to get into.
This brings this affordable, tasty cut of meat into the realm of weeknight meal options. Get a tray of crispy roast potatoes in alongside it and you’ve got a proper roast dinner midweek.
You want it to be anywhere between 80 and 85°C at this stage, this took 42 minutes for me. There’s no crackling so far but there is this bubbling starting to happen and this belly has rendered a lot more fat than the traditional method.
Speaking of which, this one is showing some signs of crackling around the edges, the 2 deep slices from scoring have opened up and the skin is starting to look like the hard, teeth-breaking crackling we all know too well.
How to Get Crispy Pork Belly Skin to Puff
Once your oven’s up to 250°C load the pork back in and watch that crackling pop. Rotate the tray a couple of times during the process and after 10 to 15 minutes you will have incredible crackling.
Now for the hardest part of the whole recipe… Leaving it to rest for at least 20 minutes. Use that time to deglaze the roasting tray and make a simple pan sauce from everything left behind.
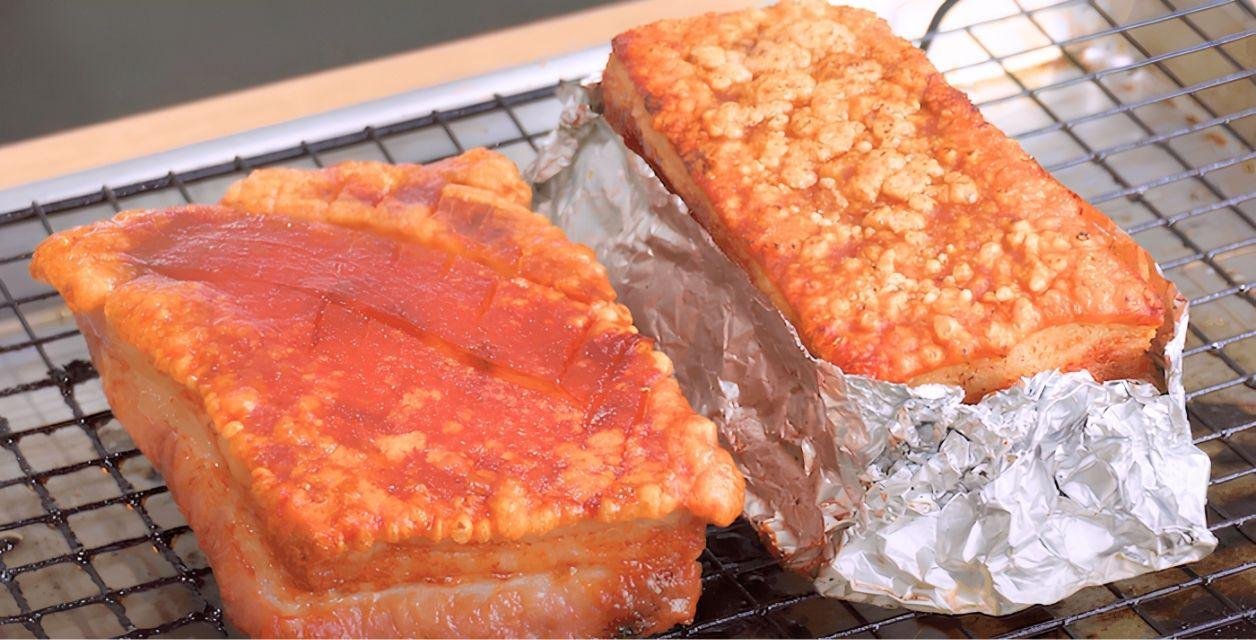
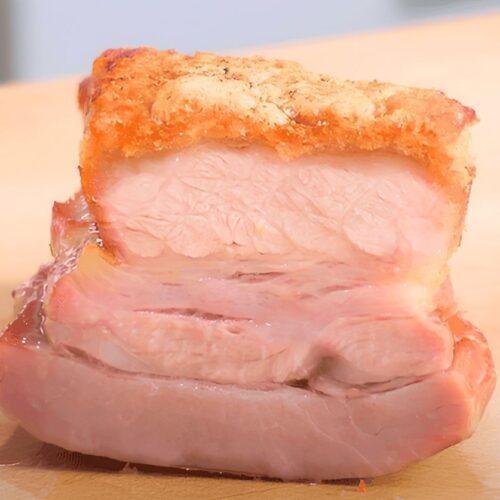
This method has worked so well on so many levels, a lot of the fat has rendered out leaving us with this light, crisp crackling, and there’s no worries about breaking a tooth! Serve it with a pan of sweet braised red cabbage to cut through the richness.
Contrast this with the other belly, there’s still this thick layer of unrendered fat and the crackling just hasn’t puffed. It would’ve got there with another 5 or 10 minutes of hard roasting but by that point the meat would be dry and disappointing. Serve it with a dish of thinly layered boulangère potatoes.
Frequently Asked Questions
Why is my crispy pork belly not crispy?
In my side-by-side test, the belly I scored and roasted the traditional way still had a thick layer of unrendered fat and the crackling hadn’t puffed. Piercing the skin, rubbing on a splash of vodka and levelling out the thin end gave light, crisp crackling instead. The scored belly would have got there with another 5 or 10 minutes of hard roasting, but by then the meat would have been dry and disappointing.
How long do you dry brine pork belly?
I like to leave it to dry brine for 12 hours in the fridge, covered in a large container with plenty of air around the pork, though you could roast it straight away. Use about 6 g of salt for a 500 g belly and rub it into the skin a little, like a light exfoliation.
Why do you simmer the pork belly in water before doing anything else?
It is the first step of the method: simmer the belly skin side down in a little water for 2 minutes, then dunk it into cold water to cool off. It starts breaking down the skin before you pierce, salt and brine it.
Why pierce the skin with toothpicks instead of scoring it with a knife?
Scoring needs a super sharp knife. If it isn’t sharp enough you have to press harder, which makes it easy to slice too deep into the meat and leaves dry, tough, chewy patches. Toothpicks are easier than scoring, you don’t need a knife at all, and you don’t need to go deep.
What does rubbing vodka on the skin actually do?
It’s a tip from someone online known as Origamicrane, who found that rubbing a splash of vodka onto the skin of the pork gave incredible results. You don’t need much, 10-20 ml for a 500 g belly, rubbed all over the surface of the skin. In my test it helped the skin crisp up.
Why roast in two stages instead of one constant oven temperature?
The first stage is a gentle 170°C (340°F), about as high as I like to go for a belly of this size and shape, because any higher cooks it too quickly and risks it becoming tough. It takes around 45 minutes to reach 80-85°C inside. Then the oven goes up to 250°C (480°F) and the belly goes back in for 10 to 15 minutes, which is what pops the crackling.
Crispy Pork Belly Recipe | Perfect Light Crackling
Equipment
- Baking / Roasting tray
- Wire / Cooling rack
- Mixing bowl / Bowl
- Chopping board
- Knife (general)
- Digital scales
- Thermometer / Probe
- Saucepan
- Toothpicks
Ingredients
- 500 g skin-on pork belly
- 6 g salt
- 10-20 ml vodka
Instructions
- Simmer the pork belly skin side down in water for 2 minutes, then dunk it into cold water to cool.
- Once the belly is cool remove from the water and pat the belly dry.
- Using toothpicks, a fork, or a jacquard pierce the skin of the pork all over (see pics for depth)
- Evenly cover the belly in salt and rub the salt into the skin side a little, I used around 6g for a 500g belly.
- Now rub 10-20ml of vodka onto the skin.
- Leave the belly to dry brine for 12 hours.
- Once brined roast at 170c 340f for around 45 minutes, until the internal temp reads 80-85c (176-185F).
- Remove the belly from the oven and raise the temperature to 250c, 480f.
- Once the oven is hot place the belly back in for 10 to 15 minutes, rotating the tray a couple of times, until the crackling has puffed. Rest for at least 20 minutes.
Video
Nutrition
Nutrition Facts
| Total Fat | 66.3g |
| Saturated Fat | 24.2g |
| Cholesterol | 90mg |
| Sodium | 621mg |
| Total Carbohydrate | 0g |
| Dietary Fiber | 0g |
| Sugars | 0g |
| Protein | 11.7g |
| Potassium | 231mg |


Hi Ben,
I’ve watched this video on You Tube about 6 times today because we were given 4 full size pork bellies and I have never cooked one in my life! I really appreciate the thought you put into your video; it makes a lot of sense. Toward the end you mention to watch the next video would contain ways to plate pork belly. I cannot find it anywhere! Can you please point me in the right direction?
Thank you so much! Keep your fantastic coming.
Warmly,
Margot Liebenthal
Hi Margot, apologies for the delayed reply. I’m glad you liked the pork video, how did the recipe turn out? The video about plating is currently titled as “Bored of Cooking At Home? Try THIS!”. I don’t plate any pork belly in that video but it shows you different ways to plate different ingredients. The first and last plates you can apply to a pork belly dish. I hope this helps!
I tried this to a tee but still didn’t get what you did 🙁
That’s a shame! I’ve had so much feedback saying it’s worked so well for so many people. I would look at the “dryness” of the skin, some breeds/types of pig will have thicker skins and fat layers so you can let them air dry for more time. Also try poking a lot more holes (a fork works well if the toothpicks aren’t strong enough to break the skin) and the high oven temperature for the final roasting section is important as well, let that oven get really hot. I hope this helps!
You mentioned lowering the temperature and increasing the cooking time for the first roast. And I have 750g not 500g. Could I just drop the temperature to 140C and just see how long it takes to get to 80-85C meat temperature?
I have a Combi steam oven and would love to know how to adapt the recipe for that.
Hi Ben, thanks for the video. I used an airfryer. I stayed on low heat until 75-77c in the centre of the meat, then high heat until enough crackling appeared. The internal temperature at that time was over 95c, but as pork belly doesn’t really dry out I see no problem in that. All in all it worked very well. 2 comments:
I used about 6 g of salt but found it to be a tiny bit too salty,
I will try to switch to high heat at an internal temperature of about 70c, maybe even 65c. That should save some time, get better crackling and a lower internal temperature at the end of the cooking process.
Thanks for the video again and a happy new year!
Can I substitute the vodka for something else?
This recipe is on point. Been trying to make chicharon “High Brow” PR style. It is sublime, had not been able to duplicate. This recipe got me close. Thanks!!